Page 9: Windows 10 - Installation and Use
Now a mobile data solution for Windows 10The Mobile Data Client for Windows 10 is pitched towards the growth of Windows 10 based ‘detachable and convertable' notebook PCs and tablets. This reflects a trend towards ‘two-in-one’ devices replacing laptop PCs in the office and then the keyboard being removed to take a tablet to the field. Ruggedised industrial tablets also use Windows 10 in enterprise and government deployments where Windows may be preferred. The Mobile Data Client runs on tablets with Intel processors, not Qualcomm processors (see below). Thus all major mobile platforms are covered by CreativityCorp and Mobile Data Studio going forward.
|
 |

Consider using MDS Cloud Relay to connect MDS Server and Windows tablet devices, see Skills page 10.
Installation of Mobile Data Client for Windows 10 Software
- File: Windows application or program files have the extension .exe, here being MobileDataClientSetup.exe. The current Mobile Data Client is version 10.3 to align with Mobile Data Studio version 10.3 on the server side.
- Download and Install Software: Click on links to either download directly to a Windows 10 device after browsing to either the Trial download or your Login web page after purchase, OR put download software into a folder on a USB 'stick' and install to Windows tablet. Contact CreativityCorp for queries regarding download and install.
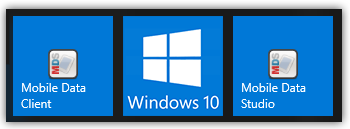
- Mobile Data Client in Start: After installation of the Mobile Data Client a folder showing 'Mobile Data Client' is shown in Start containing the 'MDS' icon which can be pinned to Start and Taskbar.
- Settings in Mobile Data for Communications:
Mobile Data Client communicates with the Mobile Data Studio
server using the wireless TCP/IP functions of Mobile Data Studio,
see page 11 Wireless (TCP/IP) functions.
The Settings menu will present when Mobile Data
Client is first opened. Communication from the tablet
device to the Mobile Data Studio server can either be via
the mobile phone network or a WiFi connection. The Server
Address of either or both a Local Area Network or an
externally exposed Internet related Address will be shown in
the Wireless Activity window of Mobile Data Studio. In the alternative to a numeric IP address a text DNS can be
used; for example mds.creativitycorp.com . A screen shot of Listening on IP Address
is shown below, presenting an external IP address and address of a local WiFi network (10.0.0.1).
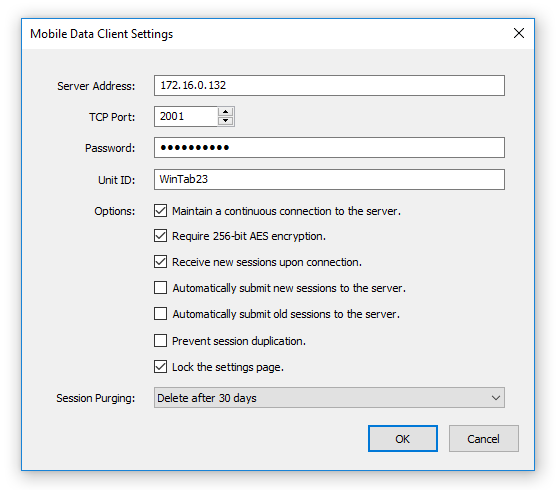
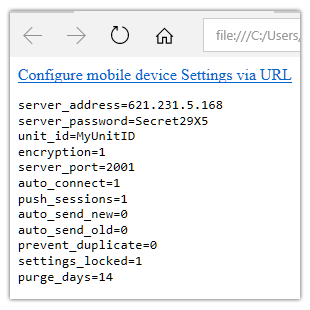
The TCP Port by default is 2001, but another may be specified, Password to match that on the Mobile Data Studio server, and Unit ID being the identification assigned to the mobile client device (without space). Options for client server relationship are: Maintain a continuous connection to the server, which enables connection whenever Mobile Data is open and the Mobile Data Studio server is running; Require 256-bit AES encryption, providing a secure 256-bit AES encrypted connection between the mobile client and server (requiring a ten character password); Receive new sessions upon connection enables receipt of sessions from the server and should be left on; Automatically submit new sessions enables automatic submission of sessions originating on the mobile device when they are closed; Automatically submit old sessions relates to sessions which have originated on the Mobile Data Studio server, and when enabled submits them on closure of the session; Prevent session duplication prevents duplication of sessions in the Session Folders; Lock the settings page enables mobile deployment managers to control access to Settings, to un-lock the Settings page the TCP/IP access Password must be entered; Session Purging to delete Sent and Deleted sessions can be set from immediate to 100 days.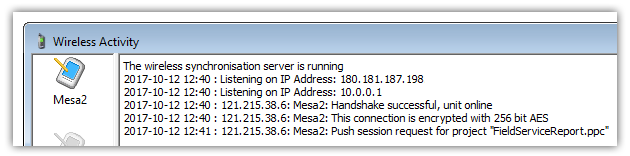
- The Server Address, Port, Password, UnitID, Session management and a Lock of the Settings page can all be set via a URL sent to a mobile device via either email or SMS. Download an example 'Configure mobile device Settings via URL'; and modify for your Settings requirements. Note, the explicit details of Settings in the example shown below would not normally be sent to users, only the URL.
 |
 |
Installation of Projects to Windows 10 Device
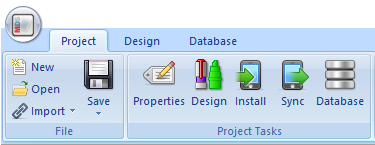
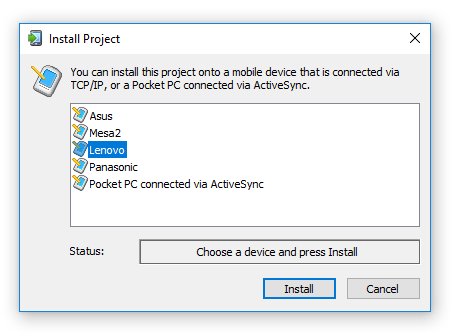
Projects developed in Mobile Data Studio are installed to Windows 10 devices via TCP/IP communication, not ActiveSync or other sync tools. Open a project in Mobile Data Studio via the Project tab, click on the Install icon (see below) which opens the Install Project window, select a device to which the project is then installed via the 'Install' button. In the example shown below, the four connected devices, the Mesa 2, Asus and Lenovo tablets, and MSI notebook PC are Windows 10 devices. Another method to install a project is described on page 11 Wireless (TCP/IP) Functions; open the Wireless Activity monitor and make the connection from the Windows 10 device, which will then appear in the monitor. Open one or more projects in Mobile Data Studio. Select and click (right) on the icon for the Windows 10 device/s and 'Update Project' to install project to the Windows 10 device/s. The Auto Load menu (see page 2 Designing a Project) includes a control to Automatically install this project on connecting devices which enables selection of projects that will be automatically installed to mobile client devices on their first connection to the Mobile Data Studio server. This function improves efficiency of management of large dispersed mobile deployments.
 |
 |
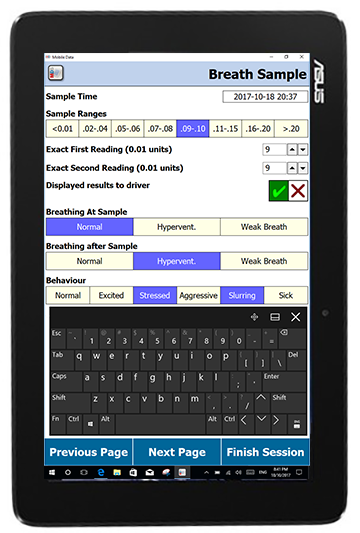
Use on Windows 10 Tablet Device
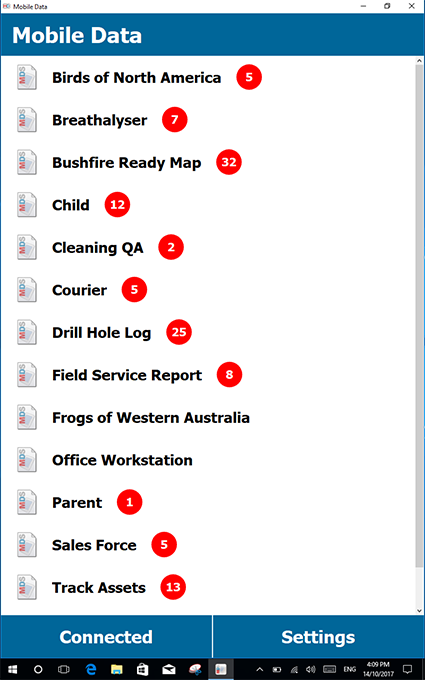
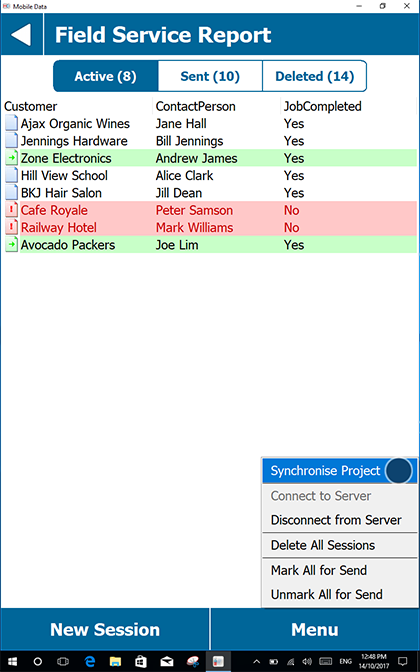
The MDS icons and titles of installed projects are shown listed in the Project Window; in association with a red dot showing the number of sessions in the Active sessions window. Below are shown Example projects provided in C:\Program Files (X86)\Mobile Data Studio\Examples\ ; install the Examples to test the system, they can be deleted afterwards (tap and hold on a listed project to Delete). Tap on a listed project icon to open the Session Window which shows a list of sessions in each of the Active, Sent (to server) and Deleted sessions windows, accessible via a tab at the top of the window. The Sent folder provides reference access for users in the field to sessions that have been sent to Mobile Data Studio server. The Settings page provides a control for timing of 'purge' of sent and deleted sessions, from immediate out to 100 days. To avoid double entries in databases, sessions in the Sent and Deleted windows cannot be re-sent to the Mobile Data Studio server. However, sent and deleted sessions can be duplicated and returned to the Active window.
 |
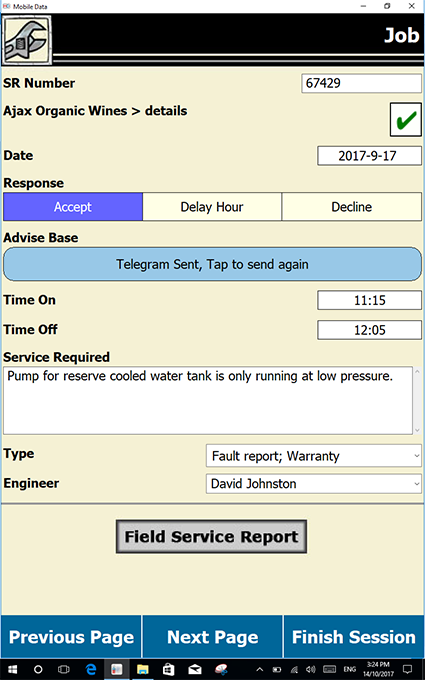 |
When opening the Active Sessions window initially the Session Window will be blank, tap the 'New Session' button to open a session. Sessions for the Field Service Report example project are shown below.
 |
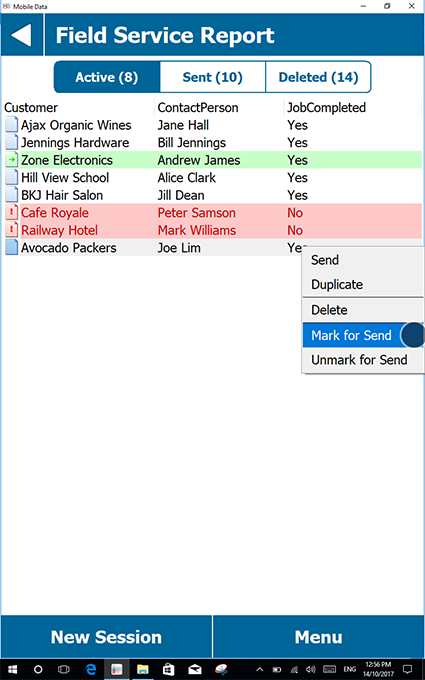 |
When sessions are finished or saved they appear in the Active Session Window awaiting further management, either via the Session Menu at the bottom of the screen, or by tap and hold of a specific session which displays a Session Menu for managememt of the selected session. These controls apply both to sessions initiated and filled on the Windows 10 device and to sessions sent to the Windows 10 client device by the Mobile Data Studio server. Sessions that have arrived from the Mobile Data Studio server are shown in red. Marked sessions can be sent to the Mobile Data Studio server via TCP/IP either individually or in a batch; they are shown in green. Please review page 11 Wireless (TCP/IP) functions to understand their operation. The Duplicate function applies to individual selected sessions, providing a convenient duplicate of data, but as a unique new session.
Session List Columns are resizable by dragging on the column heading, columns manual adjustment can be reset back to zero by double tapping on the session column heading, user adjustments to sessions widths are saved and restored when the project is opened and closed, and tap to top of columns sorts sessions alphanumerically.
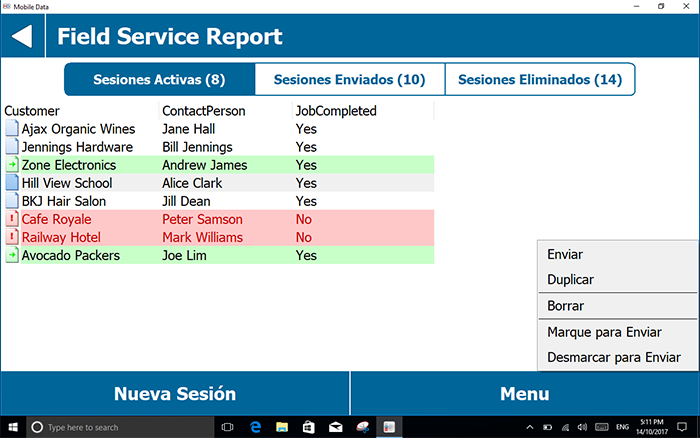
Translation of Menu Language
The Windows 10 client side controls can be translated (see example below) and the translated file can be offered wirelessly to clients via an option in the server side wireless options to Offer language translation file (via Setup menu, Wireless, see page 11 Wireless). This allows the language translation file, and any updates to it, to be distributed automatically. The ClientLanguage.ini file is found in C:\Program Files (x86)\Mobile Data Studio on the server and can be edited in Notepad. The INI file is organised in logical sections; for most purposes only the menus and text of buttons need to be translated. The INI text file can also be used to customise instructions to mobile users. When translating to Simplified Chinese the INI text file should be saved as Unicode format. Following translation of INI, maintain a copy outside of the Mobile Data Studio program folder as upgrades to Mobile Data Studio will replace the ClientLanguage.ini file with original. Copy translated ClientLanguage.ini back into Mobile Data Studio program folder after upgrade to Mobile Data Studio.
 |
Hotspot in Windows 10
While the standard Mobile Data Studio deployment using wireless TCP/IP is effective for multiple mobile clients to connect to Mobile Data Studio server, a TCP/IP connection can be made using the 'Hotspot' functions in Windows 10. This may be useful where a Windows 10 tablet without 3G/4G mobile network function can connect via a proximal smartphone through to Mobile Data Studio server.
 Previous Page Previous Page
|
Jump to page: |
Next Page 
|